The Simple Joys of Life


Sometimes you have to remember to stop, smell the roses, and count your blessings.  It’s so easy to get caught up with the day to day.

A few things I’m thankful for today…

  1. The hubby.
  2. The family.
  3. Awesome friends.
  4. Having a job.
  5. Having a roof over my head.
  6. My iPhone.
  7. Coke Zero.
  8. Christopher Nolan- I LOVE that man’s ability to direct!

9.  Mochi.  I really love my cat. 

I don’t care if I sound like some crazy cat lady.  I love my cat.

For those of you who have never owned a cat, they are not the evil nemesis of dogs.  They are not plotting to kill you.  And if they could speak, they would not have bad grammar.  Well, maybe some of them would….


They are amazing.  They are loyal.  They are loving.  They are clean.  They are smart.  They are the best.

I mean, have you see Maru the Cat?  If not, please go on YouTube now…

*Kelson wants me to preface that I’ve never owned a dog before.  I don’t think that makes any of these statements less valid.


10.  Quinoa

I love the weird spelling.  I love saying “keen-WAH!”  I love the nuttiness.  I love that it’s protein filled.  I love the texture and the fact they’re little balls.  I love quinoa!

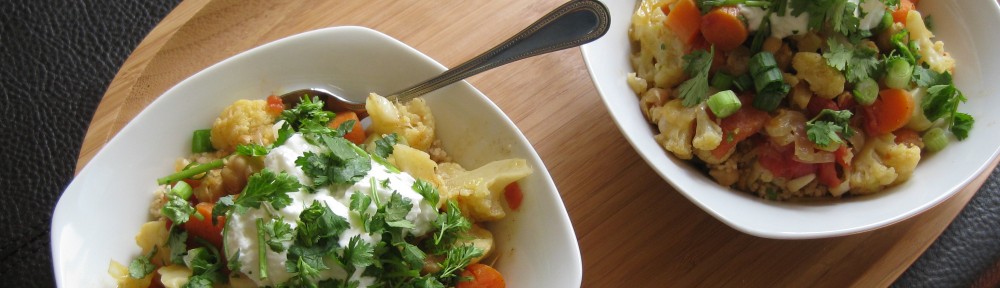
And to make room for you to just relax, enjoy end ends of summer, and count your blessings… I bring you a quick quinoa vegetarian meal to enjoy.

Quinoa Summer Salad (serving 6-8 people)

Ingredients

  • 2 cups dry quinoa
  • 1/4 cup dried cranberries
  • 1/2 cup golden raisins
  • 1 chopped red bell pepper
  • 1 chopped orange bell pepper
  • 1/2 cup chopped cilantro
  • 1/2 cup extra virgin olive oil
  • 1/2 cup lime juice
  • 1 tbsp spicy brown mustard
  • 5 minced garlic cloves
  • pinch of salt

Instructions

1.  Follow the instructions on the quinoa packaging and cook up the quinoa.  *My instructions ask me to rinse the quinoa in a mesh strainer until water runs clear.  Then cook in 4 cups of water and bring to boil.  Turn heat to low and simmer until water is absorbed and you’re left with a pot of lovely quinoa- approximately 25 minutes.

2.  Get a large bowl and throw in the quinoa.  Mix in the dried cranberries and golden raisins.  Mix in the bell peppers and cilantro.

3.  Dressing!  Get a small bowl and mix in the extra virgin olive oil, lime juice, mustard, garlic, and salt to taste.  Mix well.

4.  Pour the dressing onto the quinoa mix and toss lightly.  Get ready for some light, fresh, deliciousness for dinner!  Enjoy!

Hey! Hey! What are we going to eat today?

How about some delicious Chapchae?

As this food blog progresses, you will learn that my favorite foods involve potatoes and noodles.  I think it’s due to my upbringing of Chinese food mixed with America’s love of potatoes.

So what was the most amazing discovery that my little 10 year old self came across through trading lunches in the school yard?

Sweet potato noodles.

Dangmyeon, which is the Korean word for sweet potato noodles, is amazing!  In fifth grade, I recall bringing my standard turkey with lettuce and mayo on toasted wheat almost everyday.  One day, I made friends with a student who had just come from South Korea.  She, like myself, was sick of the same old meal and opted to swap.  My nasty sandwich (sorry Mom!) was then traded for a beef and dangmyeon dish with white rice.

Dear God, it was amazing!  These slippery, transparent noodles were like nothing I had had before.  I thought they were vermicelli or some type of glass noodles, but I couldn’t put my finger on why it was so delicious.  Then again at 10, I’m sure I just gobbled it up without thinking twice.

It wasn’t until I got immersed in the Korean food culture of Los Angeles that I found these noodles in a commonly found dish called Chapchae.

Chapchae is a stir-fried, vegetable-filled noodle dish.  DELICIOUS!  So full of color and so tasty (especially paired with delicious barbequed meats).

After ordering it one too many times and feeling the lightness of my wallet, I opted to make this at home.  First step was to find a recipe and see what exactly this noodle was, which lead to the discovery of the sweet potato noodle.  Also, for those of you who are gluten-free (like my lovely college roommate), this might be a great dish for you!  Just sub in tamarind sauce for soy sauce (Thanks Mary for the tip!).

Sweet potato noodles can be a little tough to find.  I was able to find them at my local Korean markets or Asian-food markets.  It’s cheap (usually a large bag runs you less than $2 bucks) and great to stock up on in the cabinet.

Chap Chae Recipe

Ingredients- Serves 4-6 people

  • 1 package of sweet potato noodles (11 oz)
  • 3 tsp sesame oil
  • 1 tbl olive oil
  • Half a white/yellow onion
  • 2 carrots
  • 3 cloves of garlic
  • 3 stalks of green onion
  • 1 cup mushrooms (shitake or woodear)
  • 1/2 lb of spinach
  • 4 tbl soy sauce (tamarind sauce for those gluten-free folks)
  • 2 tsp sugar
  • 1 tbl sesame seeds

1. Bring a large pot of water to boil (for the sweet potato noodles).

2. Prep work:

  • Thinly slice your onion.
  • Peel and cut the carrots into little matchsticks.
  • Peel the garlic and finely mince.
  • Cut the green onions into about 1 inch lengths.
  • Thinly slice the mushrooms.
  • Separate the spinach leaves from the stems.

3. Once the pot has boiled, cook the sweet potato noodles.  There’s usually instruction as to how long they should be cooked, but it’s usually only about 5-6 minutes.

4. Once cooked, drain and rinse the sweet potato noodles with cold water.

5. Cut the sweet potato noodles with kitchen shears a few times.  Mix in the sesame oil.

6. In a small bowl, mix the soy sauce and sugar together.

7. Add the olive oil to the wok and heat on high.

8. Once hot, add the onions and carrots for about a minute.

9. Add the garlic, green onions, and mushrooms for about a minute.

10. Add the spinach and then the soy sauce and sugar mix.

11. Add the noodles.  Mix it up.  I tend to add more soy sauce at this point or salt to taste.

12. Once cooked, add the sesame seeds and some more sesame oil.

Get ready to enjoy some delicious chapchae!  This is great on it’s own or accompanied with bulgogi.

[Possibly faced with some blank stares…]

What?  You don’t know what bulgogi is or how to make it?  Hmm… I see a post coming…

Enjoy!

*the photos included don’t include the mushrooms, since my brother in-law is not a fan.

Red, White and Blue…

What comes to mind?  America.  4th of July.  Missile pops.

Alas, this post is dedicated to the one and only…

POTATO.

Yes, this is probably in your top 3 starchy friends that you can’t live without.  Yes, there are a bajillion ways to make them, love them, and appreciate them.  And yes, you have probably misspelled the plural at some point in your life.  (P-O-T-A-T-O-E-S)

So what adventure are we sharing with you?  The fact we have grown, raised, and harvested our own blue (more commonly known as purple) potatoes!

This is the first edible item we have grown in our backyard.

Apparently purple potatoes originated in South America and are very rich in antioxidants.  They tend to grow year round and we’ve heard through the grapevine that they do very well in our fog-filled climate.

Hey potato, can I eat you now?

When is a potato ready to become the deliciousness it was meant to become?

No idea.

Again, we went to the trusty internet and tried to learn as much about potato harvesting on a smaller scale.  In summary, we learned how to recognize the plant (photo on left) that tends to begin bloom in the spring.   Once the potato plant has grown and flourished, it begins to wilt and die… which apparently is the big signal to us that says “HEY GUYS!  GET READY FOR SOME DELICIOUSNESS!”  Photo on the right tried to capture that proclamation.

P

O

T

A

T

O

E

S

Once the potato plant has wilted, it is time to carefully harvest your purple starchy friends…

We ended up with a pretty good haul after carefully unveiling our potatoes.

Took them upstairs.  Had Mochi (our trusted food inspector and beloved cat) verify that they were good to go.

Washed the potatoes up.  Accidentally over-boiled them, so we opted for a purple mash versus a vinegar based potato salad…

Simple Mashed Potatoes (with fresh purple potatoes)

Serving:  6 individual sides

Cook Time:  Approximately 30 min.

Ingredients

  • 3 lbs Freshly plucked purple potatoes
  • Half a white onion
  • Water
  • Salt
  • Butter
  • Milk
  • Olive Oil
  1. Wash the potatoes and set them aside.
  2. Fill a small pot with water and two pinches of salt.  When the water reaches a boil, put the potatoes in with the skin on.  Boil for 10 minutes until easy to mash.
  3. Dice the onions.  Heat a pan with olive oil and cook the onions until browned.  Set aside.
  4. Pour the potatoes into a strainer and run them through cold water.  The skin should come off easily at this point.
  5. Throw the potatoes into a bowl to mash.  If you make as much mashed potatoes as we do, a masher or ricer comes in handy.  If not, a wooden spoon will do the trick too.
  6. Pour in half a cup of milk (add more if you want a more creamy texture, add less if you want to maintain your lumps).
  7. Add half a stick of butter and the cooked onions.
  8. Begin mashing until you get the consistency you want.

And boo-ya!  Throw your colorful mash with some BBQ pork ribs and roasted corn (because everyone has that in their fridge from Labor Day weekend leftovers) and you’ve got yourself a beautiful meal!

Enjoy some purple potato goodness!

Day 8 of Kimchi Making…

Day 5 of Kimchi Making…

After much anticipation, we have made the mysterious fermented wonder that is KIMCHI.

By day 5, we popped open the lid and found that our kimchi hadn’t changed that much since day 3 in terms of looks….

After another taste test, we found it was indeed spicy and had the right flavors.  The main problem we found was that it wasn’t that pickled.  Due to my fear of leaving it out for more than 4 days (mold???), I decided it was time to put it in the fridge and hope for the best.

After much speculation and internet reading, I realized I had broken my golden rule.  I did not follow my recipe.  I had left out the fish sauce in the recipe that I was using.

I am not a fan of fish sauce, but did not realize that by leaving it out I was leaving out the added salt (which would help in the pickling process).  Most Vietnamese fish sauce (the most commonly found fish sauce in the supermarket) is mainly a mixture of fermented fish and salt.  What to do?  What to do?

Time to wait and not be rash.  The whole concept with kimchi is that it sits out, gets stinky, and gets better with age.  Therefore, patience is a virtue that may help this process and I would give it a few more days before deciding if this was a failed endeavor or salvageable.

Day 8 of Kimchi Making…

Success!  We made KIMCHI!

Day 3 of Kimchi Making

Pickling.  The art of fermentation that enabled people to preserve food through harsh winters and long journeys.  Giving us salty treats that are found in various ethnic groups and cultures across the board.

Whether it be your classic “pickle” made from cucumbers to pickled herring, carrots, pig’s feet, daikon, eggs, sauerkraut, and (of course) kimchi; there is bound to be a fermented friend that wants to accompany your meal.

What is “bad kimchi”?

  1. No flavor?
  2. Not spicy?  No pickling has occurred?
  3. Super stinky?  Or does that just mean it’s really authentic?

No, these are somewhat subjective fears that can be saved.  No, truly bad kimchi would be…

MOLD.

Evil worldwide web led me to folks that said they had found MOLD in their kimchi.  Should the kimchi be gray and moldy?  Maybe the spot I put it in wasn’t cool enough and too dark/damp?  Did I not put enough salt to prevent mold?  Oh dear.

Time to open up the kimchi and find out…

Kelson popped open the lid and I quickly shoved my head over the jar to take a big whiff.  Spicy.  Kimchi-looking.  NO MOLD.  Whew!  But how do I really know it’s ready?

“If it walks like a duck, quacks like a duck, looks like a duck, it must be a duck.”

It looks like kimchi.  Smells like kimchi.  Tastes like kimchi?  [Gulp]  Then it must be kimchi.

Kelson’s reply, “I just brushed my teeth.”

[1 hour later]

I’m blogging and not hurling over a toilet, so that’s a good sign.  And yes, it did indeed taste like kimchi.  Very mild kimchi.  Probably due to the fact I used my made-in-hawaii-but-has-Korean-characters mix pack.  Also, it didn’t really have that pickled flavor yet (which has been said to come with time and refrigeration).  With that I added a bit more salt, mixed it up, and sealed it for another day.

Day 2 of Kimchi Making…

We wait.

Kelson thinks he has begun to smell the “stink”, but I have yet to smell anything.

Depending on the recipe, fermentation can be about two to four days.

The jar has been sitting on the floor of our baking area (yes, we have a baking area) and it seems to be doing just fine.  It’s in a cool place without direct sun exposure.  Undisturbed.  Ready to ferment away!


“Kimchi, Kimchi, Kimchi”

The kimchi refrigerator.

Kelson and I lived in LA for about 4 years.  We left some really great people, great weather, and great food.  We had a lot of favorites in LA, but we definitely developed a soft spot for Korean food.

We have a favorite set of sisters in LA who have the nicest family ever.  The first time we were in their family home, our eyes spotted this large silver appliance.  And yes folks, this family had a kimchi refrigerator.

I know you probably just googled it.  Hell, we did too as soon as we went home that night!  We had no idea people took their kimchi so seriously!  And how there were so many gradients of fermentation.  I mean, isn’t it just rotting cabbage and chilli???

Ah, we were so simple-minded back then.

Years later, we have continued to have kimchi at restaurants, from the supermarket, or from friends… but we never thought to make it ourselves.  Until now.  Why you ask?  Well, let’s just say I got sick of buying tiny jars of kimchi and polishing them off so quickly.  And to top it off, we learned to make a mean bulgolgi, chap chae, and kimchi fried rice… and what goes with that?  Lots and lots of kimchi.

Day 1 of Kimchi Making

I did some lovely internet searches and found the basics of what I needed to start this process:

  • glass jar that can be sealed
  • napa cabbage
  • salt
  • sugar
  • water
  • daikon (common substitutes: carrots or cucumbers)
  • green onion
  • garlic
  • Korean spices… ?

Kelson and I have one rule of thumb we follow when trying a new recipe.  FOLLOW IT TO THE TEE THE FIRST TIME.  Go with it, see where it takes you, and then make alterations to your liking the next time you go for it.

So I followed the most basic recipe I could find.  Unfortunately I do not have a Korean market conveniently near me, so I found a “Kimchi mix” that seemed to have the spice I was looking for.  And yes, I bought a mix pack.  Don’t judge!  This is the first time I’m making it!  And in my defense, at least there was Korean printed on the outside (although made in Hawaii…)

  1. I soaked my chopped up cabbage in salted water for about 2 hours.
  2. Strained and rinsed the cabbage out.  Dumped it into a large bowl.
  3. Mixed the other ingredients together and tasted the “kimchi mix”.  Not very spicy, which left me worried.  I added a large spoonful of spicy garlic chilli sauce to help give it more of a kick.
  4. Mixed everything together and dumped it into my glass jar.  Sealed it up and put it in a cool place.

Now the fermenting begins…